Key Takeaways
- You can turn any meaningful photo into a custom diamond painting in just a few simple steps.
- Choosing a clear, high-quality photo is the most important factor for a detailed final result.
- Selecting the right canvas size and drill type (round or square) shapes the look and feel of your art.
- Custom diamond paintings make deeply personal gifts and rewarding, relaxing projects.
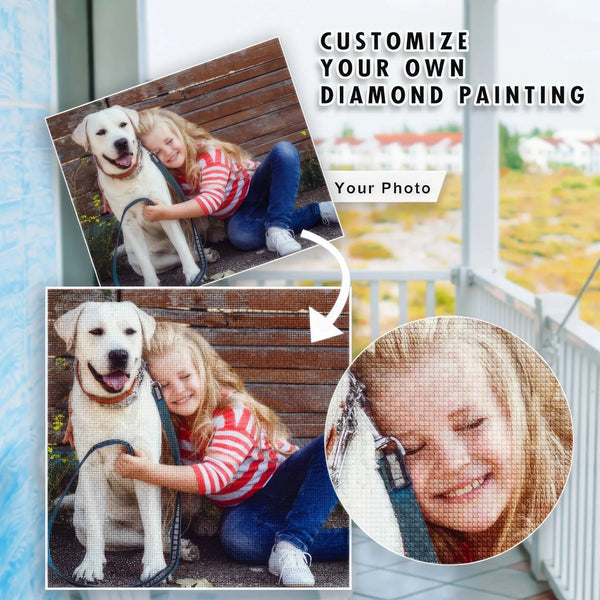
Some photos are too special to leave sitting on your phone. A custom diamond painting lets you transform that favorite image into sparkling, hand-crafted wall art you can enjoy for years.
Whether it's a pet, a partner, a landscape, or a family portrait, the process is easier than you might think. Here's how to go from photo to finished masterpiece in seven simple steps.
Table of Contents
Step 1: Choose the Right Photo
The photo you choose is the foundation of your entire painting, so it's worth taking a moment to pick the best one.
What makes a good photo?
High-resolution images with good lighting and a clear subject work best. Close-up portraits, where faces are well-lit and in focus, translate beautifully into diamond art.
What to avoid
Stay away from blurry, dark, or heavily filtered photos. Busy backgrounds and low-resolution images can lose detail when converted into a numbered canvas.
Step 2: Pick Your Canvas Size
Canvas size directly affects the level of detail your finished painting will have.
Smaller canvases
Smaller sizes work well for simple images with one main subject. They're quicker to finish and great for beginners.
Larger canvases
Larger canvases capture more detail, making them ideal for group photos, portraits, or intricate scenes.
Step 3: Select Round or Square Drills
Diamond paintings use small resin "drills," and you can choose between two shapes.
Round drills
Round drills are easier to pick up and place, making them beginner-friendly. They give a slightly softer, more sparkly look.
Square drills
Square drills snap together neatly with no gaps, creating a crisp, mosaic-like finish that many experienced crafters prefer.
Step 4: Choose Full or Partial Drill
Decide how much of your canvas you want covered in diamonds.
Full drill
The entire image is covered in diamonds for a complete, dazzling effect. This is the most popular choice for custom pieces.
Partial drill
Only part of the image is covered, with the rest printed on the canvas. This is quicker to finish and highlights a specific subject.
Step 5: Upload and Review Your Preview
Once you've made your selections, upload your photo and review the digital preview. This is your chance to check that the composition, cropping, and detail look right before production begins.
Step 6: Place Your Order
After approving your preview, place your order. Your photo is converted into a numbered canvas, and your kit, complete with diamonds, tools, and everything you need, is prepared and shipped.
Step 7: Start Painting
When your kit arrives, set up a comfortable workspace with good lighting and begin placing your diamonds. Work section by section, and watch your photo slowly come to life in sparkling detail.
Your Moment to Shine
Creating a custom diamond painting is a rewarding way to celebrate a memory, and the finished piece makes a stunning keepsake or heartfelt gift.
Ready to begin? Create your custom diamond painting today and turn your favorite photo into art that sparkles.